Generate Time TableHow to Allocate time slots for a subject
Generate Time Table.
Generate Time Table
Here the user can generate the time table for a class.
Menu Path: Productivity > Time Table > Generate Time Table
User will access the master as shown below. It will open up a screen where the user need to select the class. Please note the system will list only those class where the HOD is mapped.

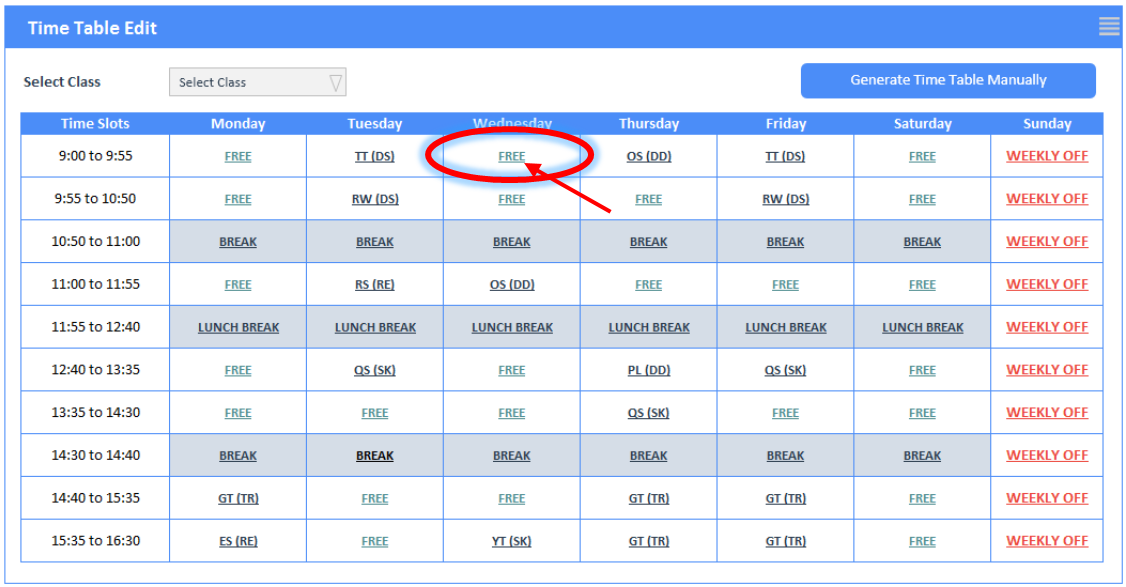
Once the User clicks on the Generate Time Table Manually, it will display time table as per the slots and existing allocations, if any. The faculty can allocate a class to any schedule as per the free slots as marked below:

When the user clicks on the FREE slot, as per marked above the app will open up a screen which list all the subjects in the class. User need to select or click on the subject as shown below:

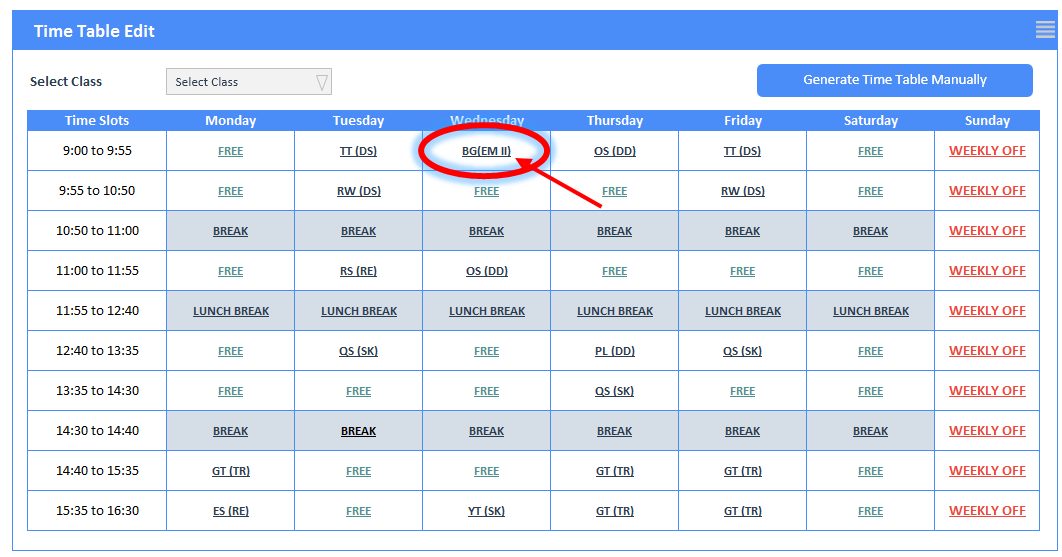
When the user clicks on the subject, the subject will be allocated into the time table. Thats it!!! Its so simple to allocate a subject as shown below:

Edit/ View Time Table
If the user wants to Edit or View the Time Table, the same can be done as shown below:
Menu Path: Productivity > Time Table > Edit/View Time Table

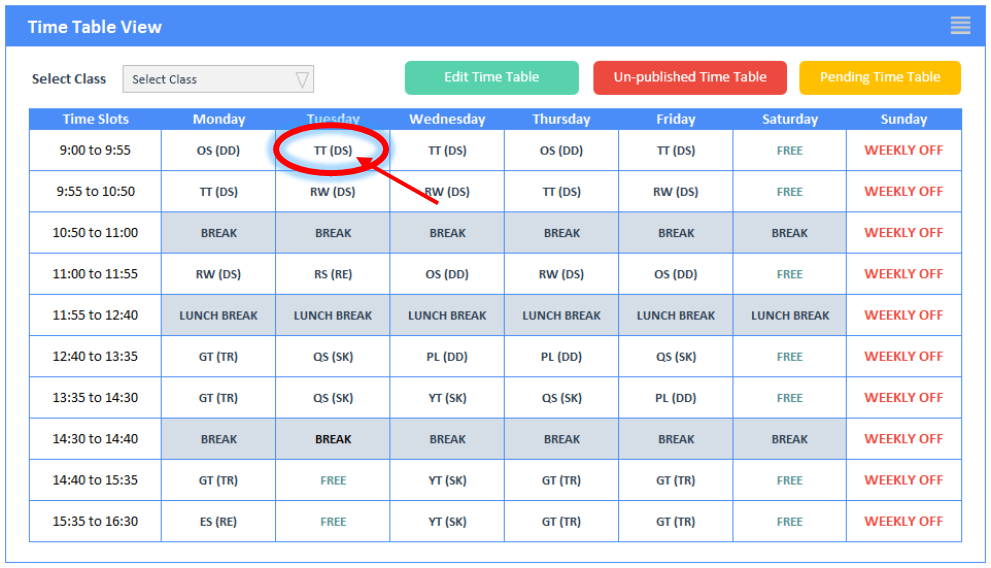
User will select the class and click on Edit time table. System will display the time table in the class. When the user clicks on Edit Time Table, it will display the time table with current status as shown below. The user can click on any slot to add the schedule or change the existing one.

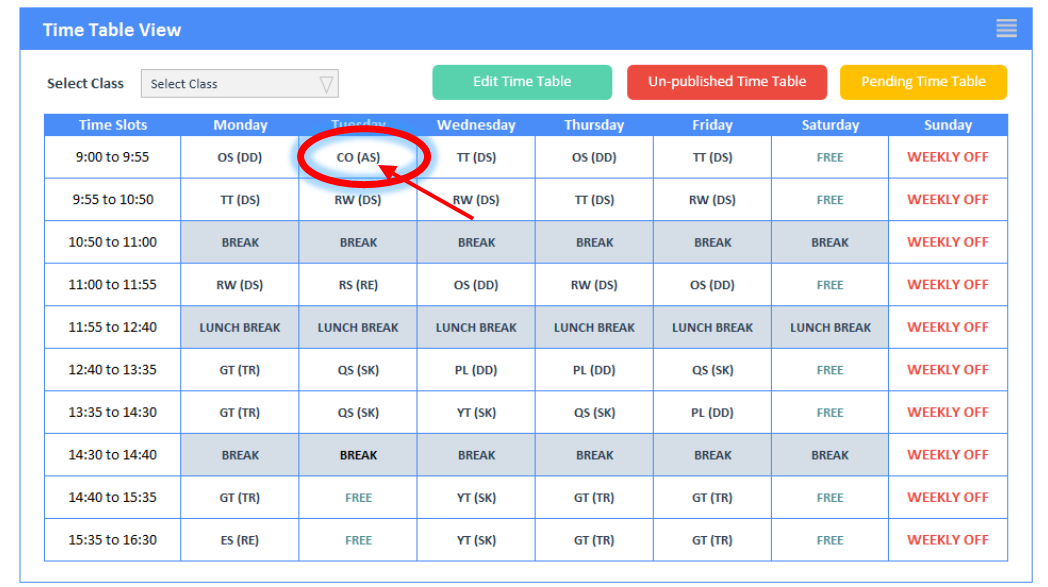
When the user clicks on the slots, then the app will open a screen where the user can select/ change the slot as shown below:

When the user clicks on the subject, the subject will be allocated into the time table. Thats it!!! Its so simple to allocate a subject as shown below:

To know more on how to share/ publish time table please refer the related article - Publish Time Table
Contact us at support@proCampuz.com or 0481-271 8407.
The screen shots shown in the helpdesk are for exhibition purpose and the real screen may differ as per the current version of the product.


